Frequently Asked Questions
USB Connection & System Requirements
Ensure your plotter and computer are properly configured for SharpCut. Learn how to set the correct USB mode and avoid common connection issues.
For best performance and proper connection:
Recommended setup:
- Windows PC (SharpCut is optimized for Windows)
- Stable USB connection (no adapters or hubs)
- Reliable internet connection
- Install software on local drive (preferably D:)
Important:
- Avoid using outdated drivers or unstable systems
- Make sure only one driver is active for the plotter
👉 A proper computer setup is essential to ensure stable communication between SharpCut and your plotter.
SharpCut works with most USB-connected plotters, but the setup depends on the brand and connection type.
Compatibility rules
- SharpCut works with USB plotters in Printer mode
-
❌ Not supported:
- Virtual (COM) mode
- Printer/plotter combo devices
👉 Make sure your plotter is connected via USB in Printer mode
Driver setup by brand
🟢 Mimaki
- Requires a specific SharpCut driver
-
Download from:
👉 https://www.sharpcutpro.com/download - Uninstall the official driver and install the SharpCut version
🔵 Roland, Summa, Graphtec
- Use the official manufacturer driver
- Download from the brand’s official website
-
Then:
- Uninstall current driver
- Reinstall the official driver
👉 This resets communication and fixes most issues
🟡 YINK, Vevor, Skycut
- No official driver required
Setup steps:
- Open Device Manager
- Expand USB Controllers
- Identify your plotter
- Right-click → Uninstall device
- Reconnect the USB cable
👉 This resets the connection and allows SharpCut to detect the plotter
Important
- Always use direct USB connection (no hubs)
- Avoid installing multiple drivers for the same device
- Make sure the correct cutter is selected in SharpCut
👉 Following the correct driver setup for your plotter brand is key to ensuring proper connection and cutting performance.
Important:
SharpCut only works with:
👉 Printer USB mode
Not supported:
❌ Virtual (COM) mode
How to check:
- Open Device Manager
- Find your plotter:
- Under Ports (COM) → ❌ Incorrect (Virtual mode)
- Under USB Controllers → ✅ Correct (Printer mode)
How to fix:
- Go to your plotter settings
- Change USB mode to Printer
- Reconnect the USB cable
👉 Once the correct mode is set, the plotter should connect and function properly.
SharpCut Login & Connectivity
Find quick solutions for login issues, device access, and network-related problems to ensure smooth and uninterrupted use of SharpCut.
There are a few common reasons why login may fail:
- Your account may have expired
- You are trying to log in from a different computer (accounts are linked to one device)
- You are using an outdated version of the software
What to do:
- Verify your subscription is active
- Update to the latest version of SharpCut
- If you changed computers, contact support to unbind your previous device
SharpCut accounts are linked to a single computer for security and performance reasons.
If you need to switch devices:
- Contact support to unbind your account from the previous computer
- Then log in again on the new device
Most performance issues are related to unstable internet connection.
Common symptoms:
- Slow loading
- Unable to open or save data
- Supernesting not working
- Network error messages
What to do:
- Use a stable and strong internet connection
- Avoid switching networks while using the software
👉 A poor connection can also cause the system to misidentify your computer and affect login.
Plotter Connection & Cutting Issues
Having trouble connecting your plotter or completing a cut? Find quick solutions for device errors, driver issues, and cutting failures.
This usually means SharpCut is not properly communicating with your plotter.
Common causes:
- Wrong cutter selected in the software
- Plotter not properly connected via USB
- Driver not installed or outdated
What to do:
- Disconnect and reconnect the USB cable directly to your computer
- Check if the correct plotter appears in the cutter selection
-
If not, reset the driver:
- Go to Device Manager → USB Controllers
- Find your plotter
- Right-click → Uninstall device
- Reconnect the plotter to reinstall the driver
If the device appears but does not execute the cut, the issue is usually related to drivers or communication.
What to do:
- Reset the driver (see steps above)
- If using Mimaki or Summa, uninstall and reinstall the official USB driver
- Make sure you selected the correct cutter model
👉 Older drivers (especially older Mimaki versions) may prevent proper connection or cutting.
Possible causes:
1. Cutter selection is empty
- The plotter may have a communication issue or hardware restriction
- The motherboard may be incompatible
👉 What to do:
- Send a photo of the plotter
- Provide VID/PID code from Device Manager
- If needed, send a video of the plotter starting up for evaluation
2. Cutting fails or stops during operation
Common issues & fixes:
-
Unstable connection
→ Reconnect USB, try another port or cable -
Plotter memory overload
→ Restart plotter and computer -
Cut stops mid-process
→ Ground the plotter to avoid static interference -
No cutting at all
→ Check:- Subscription status
- Remaining cutting area
👉 Most cutting issues are caused by connection, driver, or setup problems, so always start with those checks.
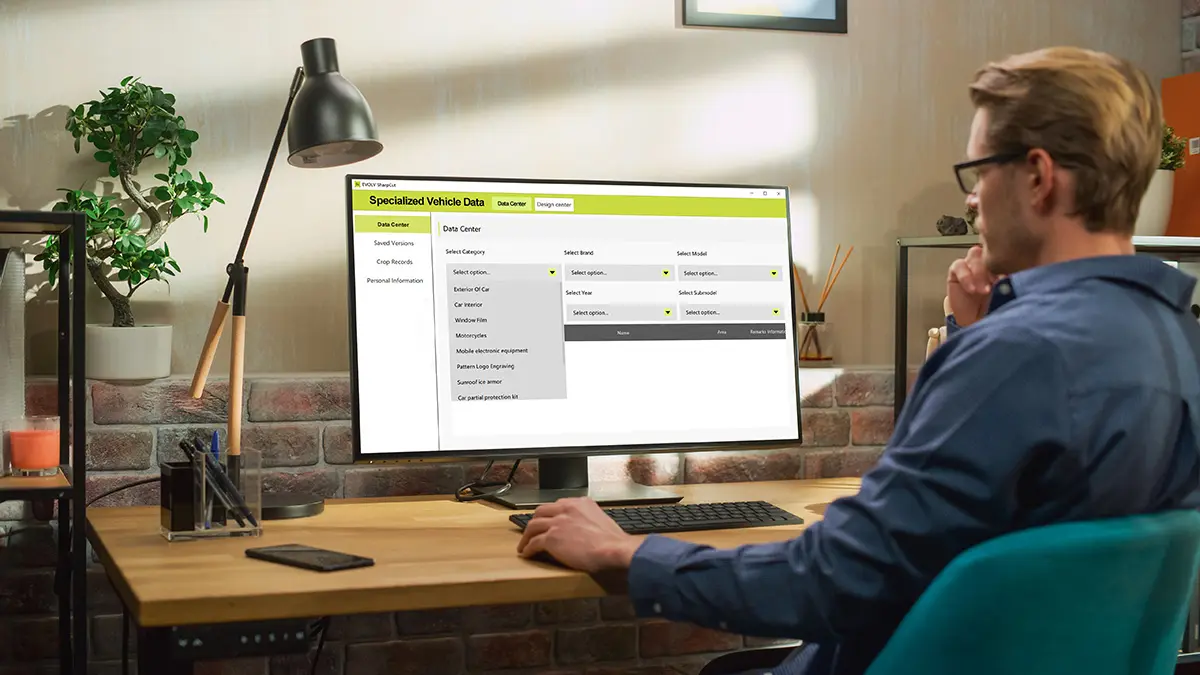
Vehicle Templates & Missing Models
Can’t find a vehicle in SharpCut? Learn how to locate the correct model or request a new template from our team.
In some cases, the vehicle year in SharpCut may not match your local market year.
For example, a 2024 model may be listed as:
- 2023
- 2022
- or an earlier year
This is because SharpCut organizes vehicles based on the earliest global release date, which may differ from regional model years.
What to do:
👉 Try searching previous years of the same model
If the model is not available after checking different years:
👉 You can request a template here:
https://www.sharpcutpro.com/request-a-template
Our team will review and provide the correct data.
To help us locate or create the correct template, please provide:
- Vehicle make and model
- Year of the vehicle
-
Clear photos of:
- Front
- Rear
- Side
- Angled views
- Vehicle badge/nameplate
This allows our data enginers to verify and deliver the most accurate template possible.